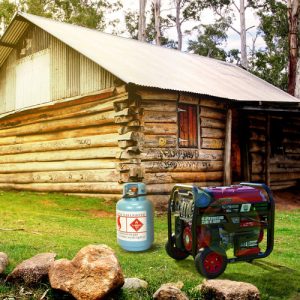
 A portable generator has lots of benefits, especially for the RVers and Campers. The fact that it can provide you with power wherever you go makes it an ideal choice for camping, tailgating, remote job sites, and even RVing. The best part is, you can still use it as a backup plan for your house when there is a power outage. However, you do need to make sure you have hooked it up properly for a secure and safe power supply.
Contents
5 Tips on How to Hook up a Portable Generator to Your Home
Before you can start enjoying the generator power in your home with a hookup, there certain things you need to do first. My guide will help you through the whole process, and at last, you will have an idea of what you’ll be dealing with.
Step 1: Select Appliances to Run on your Generator
Step one is to identify the appliances and electronics you want to run with the portable generator. It can be your TV, fridge, furnace, freezer, lights or so. You need to add their power rating in wattage, which should be 80% power of what your generator can give.
The motor appliances will use the 20% allowance for starting. If you have a long list of the devices to run, pick those that you can’t leave without, like the lights and the furnace, and drop the others for running them when need be.
Step 2: Choose the wiring system
There is a wide range of wiring systems you can use to hook up a portable generator to your home. However, you will need first to contact your local authorities that deal with power, planning department, or even the power company. Check if there are legal formalities you need to fulfill. The laws vary with different states and countries. Mostly, the most use cable system is the 10-gauge, 4-conductor cable.
Step 3: Determine the Generator Plug (Amperage and Type)
The next step is determining the plug type ideal for your generator and the amperage it works with. The information is always written beside the power panel of the generator beside the interlocking plug. Mostly, you will find it’s either 220-volt and 30-Amp or 240-volt and 30-Amp.
While at it, ensure the interlock kit is installed. It needs to fit in the breaker box, if not, you can decide to have it installed separately, but that will require a professional.
You can also decide to use a manual transfer switch panel as it’s the safest way to prevent back-feeding of the power line. It might be a bit expensive, but it comes very handy, and it’s legally permitted.
Step 4: Install the inlet box and run the wires
Now comes the dirty part. Here you need to ensure the power line is off. Switch off the main power circuit breaker. Next, install the inlet hook up outside the house with a male connector. Run the wires to connect the power inlet with the circuit breaker or the transfer switch panel.
Most probably, your service panel will have a receptacle. If not, then you need to have it installed. You also have to make sure the installation is professional and up to the code, or you might affect your home insurance cover.
Step 5: Have the connection tested
Before you can connect your generator and your appliances, you need to make sure that you have the hookup line tested. Everything here needs to be on point and up to the code. Call a reputable and pro electrician to check it for you. If it’s approved, you can now hook up the generator and run your appliance. Having done all that, you’ll now be well covered when a storm or harricane hits.
Related Buyer’s Guides and Globo Tools Review Lists:
